Guides
Small room layouts planning: the order to place furniture
Small room layouts planning goes better when furniture is placed in a fixed order: swings and fixed points first, then path, bed or sofa, storage, seating.
What to take away
- Place furniture in a fixed orderthe least flexible piece first, accents last.
- Survey door and drawer swings and mark the fixed points before any piece gets a position.
- Commit to the walking path first, then fit furniture around it.
- Anchor tall pieces to the wall and write down where everything went.
Why placement order decides the result
Furniture goes into a small room in order of how little each piece can move: bed or sofa first, accents last. People tend to start with the accents instead, and that is why the first two decisions, the biggest ones, end up wrong.
Small room layouts planning has two stages. The first is a survey that tells you what cannot move. The second is placement, where every piece earns a spot in turn, guided by a written room brief of what the room has to do. Skipping the survey is how a tidy plan on paper ends up fighting the room.
Survey the swings and fixed points first
Open every door, drawer and appliance before you place anything, and tape the arc each one needs on the floor. In compact rooms, swings collide more often than footprints do. Two doors that each work alone can make a corner unusable together.
Then list what cannot move without money: the electrical panel, radiators, registers and returns, the plumbing wall, structural columns, the window that serves as an escape route and the smoke alarm on the ceiling. A layout built around these fixed points holds up. One that ignores them turns into a change order.
Commit to the primary path before the bed or sofa
Draw the route from the entry door to the room's main function, and from there to any other door. That path is the first commitment, and every piece of furniture negotiates around it. A narrow living room makes the point quickly, as wall-hugging versus floating furniture shows.
Benchmarks help, but borrow them honestly. The Access Board publishes a short animation on wheelchair maneuvering, worth two minutes if you have never watched somebody turn in a tight space. The ADA Standards cover public and commercial facilities rather than private dwellings, so treat them as a benchmark and confirm anything binding with your local building department.
Then tape the clearance on the floor, put a chair inside it, and try to pass while somebody else is seated. That costs little and catches what a drawing cannot. Moving tape takes seconds, while moving a cabinet that is already installed takes a tradesperson and a bill.
The order to place furniture
Place the largest, least flexible piece first and let each later piece take what is left. The order below follows how little each item can move, and it is also the order to buy in. Place a piece only after the swings, fixed points and path are marked.
| Order | Item | Why it comes here | What to check before it stays |
|---|---|---|---|
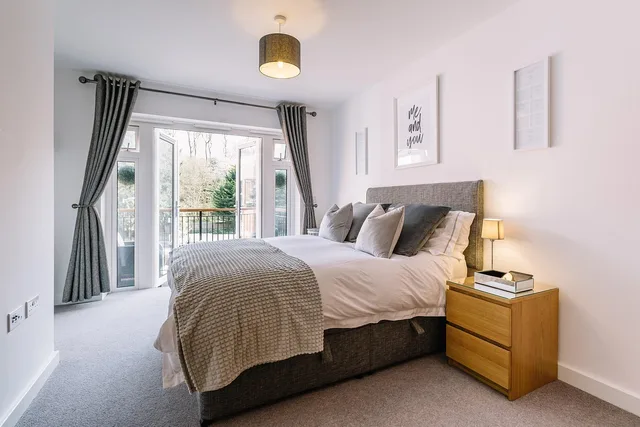
| 1 | Bed or sofa | Largest, least flexible | Door and drawer swings, and the primary path |
| 2 | Storage wall | Depends on wall length | Registers, returns and the electrical panel stay uncovered |
| 3 | Work surface | Follows daylight and power | A cable never crosses the path |
| 4 | Seating | Fills what is left | Somebody can pass behind a seated person |
| 5 | Accents | Adjust after living in it | Leave them until you have used the room |
Give each zone a landing place
Separate work from rest with visual boundaries rather than walls. A rug, a change in light, a shelf line or a rotated sofa does the job while keeping daylight and airflow intact. A rotated sofa costs nothing, so try it first.
Give each zone a landing place. An entry needs somewhere for keys, and a desk needs somewhere for work to go at the end of the day. Without that, clutter takes over the nearest flat surface and the zone stops reading as a zone.
Moves such as floating the bed or splitting the wall belong in the same zoning step, because they decide where each zone sits before the smaller pieces arrive. Try them with tape and cardboard first, which tell you what a floor plan app cannot.
Anchor the tall pieces
Anchor every tall storage piece to the wall once it has its final position. The Consumer Product Safety Commission runs the Anchor It campaign on furniture tip-overs, which makes the point that the threat is serious but anchoring is simple.
That is one more reason the storage wall comes second in the order. It depends on wall length, and anything fixed to a wall must leave the registers, returns and electrical panel uncovered. Check it against the fixed-point list before drilling anything.
Write down where everything went
Record final dimensions, product model numbers, wall types, anchor locations, paint codes and the placement order in one file. In two years you will want to replace one shelf, not redesign the room. Photograph every wall before anything closes over it.
If a plan starts going wrong anyway, our guide to common layout problems works through the fixes in order of cost. The homeowner checklist then turns the whole routine into one page to carry around the room.
Common questions
Which piece goes in first?
Can I put a bed in front of the only window?
Should I buy in the same order I place things?
Is a floor plan app enough?
In this guide
- Wood compared with metal and glass for small room layouts that hold up to cleaningWood, metal and glass in a compact room, judged on moisture movement, repairability, sightlines and the daily cleaning demands of each material.
- How a homeowner can walk a small room layout from measuring to the safety checkA five stage checklist to carry around the room: measure, test, approve, install and review, ending with the safety walkthrough people skip.
- Blocked paths, glare, and stale air: the small room layout complaints that repeat mostSmall room layouts: nine layout complaints that come up again and again in compact rooms, each with the cheapest fix first and the expensive one held in reserve.
- Small room layouts: the four things that quietly turn a plan into constructionHow permits and: where a furniture plan quietly becomes regulated construction, and the questions that get a straight answer from your local building department.
- Floating the bed, splitting the wall, and other small room layout moves that workEight layout moves that hold up in real compact rooms, from the floating bed to the doorway you stop fighting and design around instead of moving.